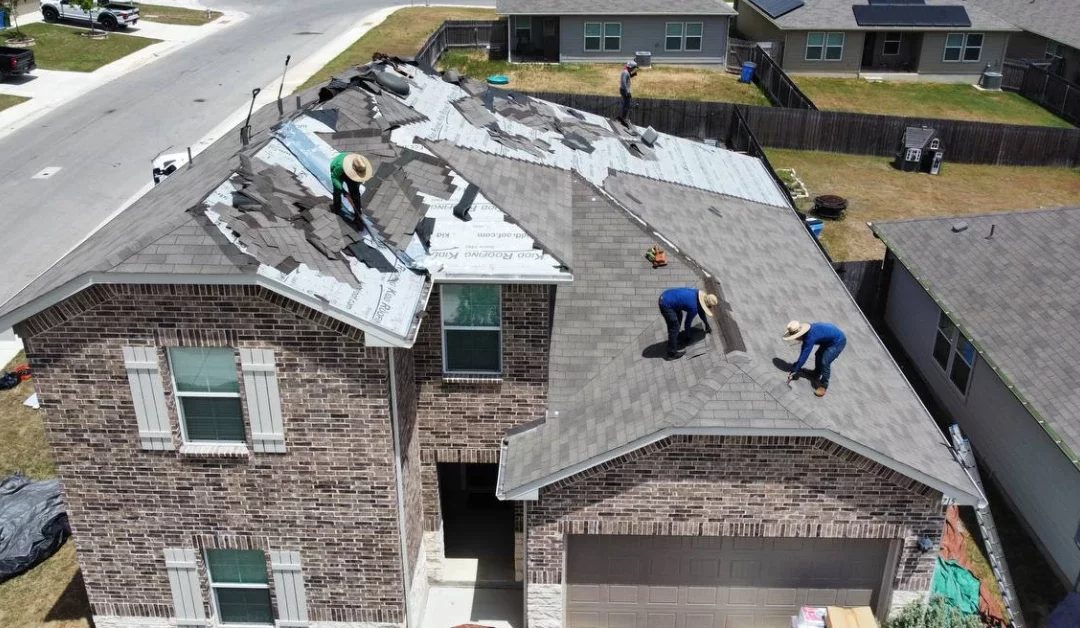
Are you ready to embark on a rooting’ tooting’ adventure right in your own backyard? We’re talking about giving your old, weather-beaten shed a fresh start by reroofing’ it! Yessiree, in this step-by-step guide on reroof a shed, we’ll walk you through the process of transforming your shed’s roof into a sturdy shield against the blazing Texas sun. So grab your cowboy hat, put on your boots, and let’s reroof a shed and wrangle this project like true Texans!
When it comes to reroof a shed, it’s important to assess the condition of the existing roof first. Take a gander at your shed’s rooftop and keep an eye out for any signs of wear and tear. Loose or missing shingles, leaks, or sagging spots need some attention before you can saddle up for the reproofing’ adventure. It might be best to consider a complete roof replacement if the damage is extensive or irreparable. But if it’s a minor sprucin’ up your shed needs, then let’s mosey on to the next step!
Step-1: Assess the Roof
Before you wrangle the materials and get to work, take some time to thoroughly inspect your shed’s roof. Look for any loose or damaged shingles, signs of water leakage, or areas that appear to be sagging. Addressing these issues before moving forward with the reproofing’ project is essential. If the damage is extensive, consult with a professional to determine the best course of action. But if a few minor repairs are needed, grab your tools, and let’s get this project rolling!
Step 2: Gather Your Materials
Now that you’ve assessed the roof and identified the repairs required, it’s time to gather the materials for the job. Round up your safety gear, including gloves, goggles, and sturdy boots, to keep yourself protected throughout the process of reroof a shed. As for the roofing materials, you’ll need shingles, roofing nails, underlayment, and a drip edge. Don’t forget your trusty hammer, a pry bar, and a reliable ladder. Make sure you’ve got all the materials on hand before you take the plunge into this Texan adventure of reroofing a shed!
Step 3: Remove the Old Roof
Yeehaw! It’s time to lasso that old roof and bid it adieu. Use your pry bar and hammer to remove the existing shingles and nails carefully. Take it slow and steady, pardner, to avoid causing any unnecessary damage to the shed’s structure. As you clear away the old materials, take a moment to appreciate the blank canvas you’re about to work on. Ain’t nothing more satisfying than a fresh start!
Step 4: Install the Underlayment and Drip Edge
Now that you’ve stripped the roof down to its bare bones, it’s time to reroof a shed and install the underlayment and drip edge. Roll out the underlayment across the roof, making sure it overlaps each row by a few inches. Secure it in place with roofing nails, starting at the bottom and working your way up. Next, attach the drip edge along the eaves of the roof, nailing it down at regular intervals. This little addition will help divert water away from your shed, protecting it from any potential leaks.
Step 5: Shingle Time!
Giddy up, partner! It’s time to lay down those shingles and give your shed a brand-new hat! Start at the bottom of the roof and work your way up, laying’ the shingles according to the manufacturer’s instructions and local building codes. Secure each shingle with roofing nails, aiming’ for four to six nails per shingle. Remember to leave a small gap between each shingle to allow for expansion during’ those hot Texas summers. Keep repeating this process until you reach the top of the roof, creating a sturdy and uniform cover for your shed.
Step 6: Finishing Touches
Congratulations, partner! You’re almost done with your reroofing’ adventure. Take a moment to admire your handiwork, but don’t hang up your cowboy hat just yet. Double-check that all the shingles are securely fastened, and inspect the roof thoroughly for any loose nails or damaged shingles. Clean up any debris that may have fallen during the project and ensure that everything is in tip-top shape. Your shed is now ready to stand tall and proud against the Texas weather!
Conclusion
You’ve successfully reroof a shed and transformed it into a sturdy sanctuary. The Texas sun ain’t got nothing on your shed now! Reroof a shed requires attention to detail, some elbow grease, and a lot of Texas spirit. You’ve tackled the project of reroof a shed with confidence and skill by following this step-by-step guide.
Remember, a well-maintained roof not only protects your shed but also adds to its aesthetic appeal. So take pride in your newly reroofed shed and enjoy the peace of mind that comes with knowing it can withstand the harshest Texas weather. And if you ever need professional assistance with your roofing needs, don’t forget to reach out to Flagstone Roofing & Exteriors. Our Texas-based expertise and exceptional service will ensure your roofing projects are handled with care.
In the vast expanse of the Lone Star State, your reroofed shed stands tall, ready to face the elements. It’s a testament to your DIY spirit and the determination to keep your belongings safe. So go ahead, admire your handiwork, and bask in the satisfaction of a job well done. With a sturdy roof overhead, your shed is ready to weather the storms and shine under the Texas sun for years to come.
Now, dust off your boots, tip your hat, and celebrate your reroofing accomplishment. Your shed has received a makeover that’s sure to impress both friends and neighbors. So go forth, Texan adventurer, and keep on tackling new projects with the same tenacity and enthusiasm. Remember, when it comes to reroof a shed, you’ve proven that anything is possible with a little know-how and a whole lot of Texas grit.


